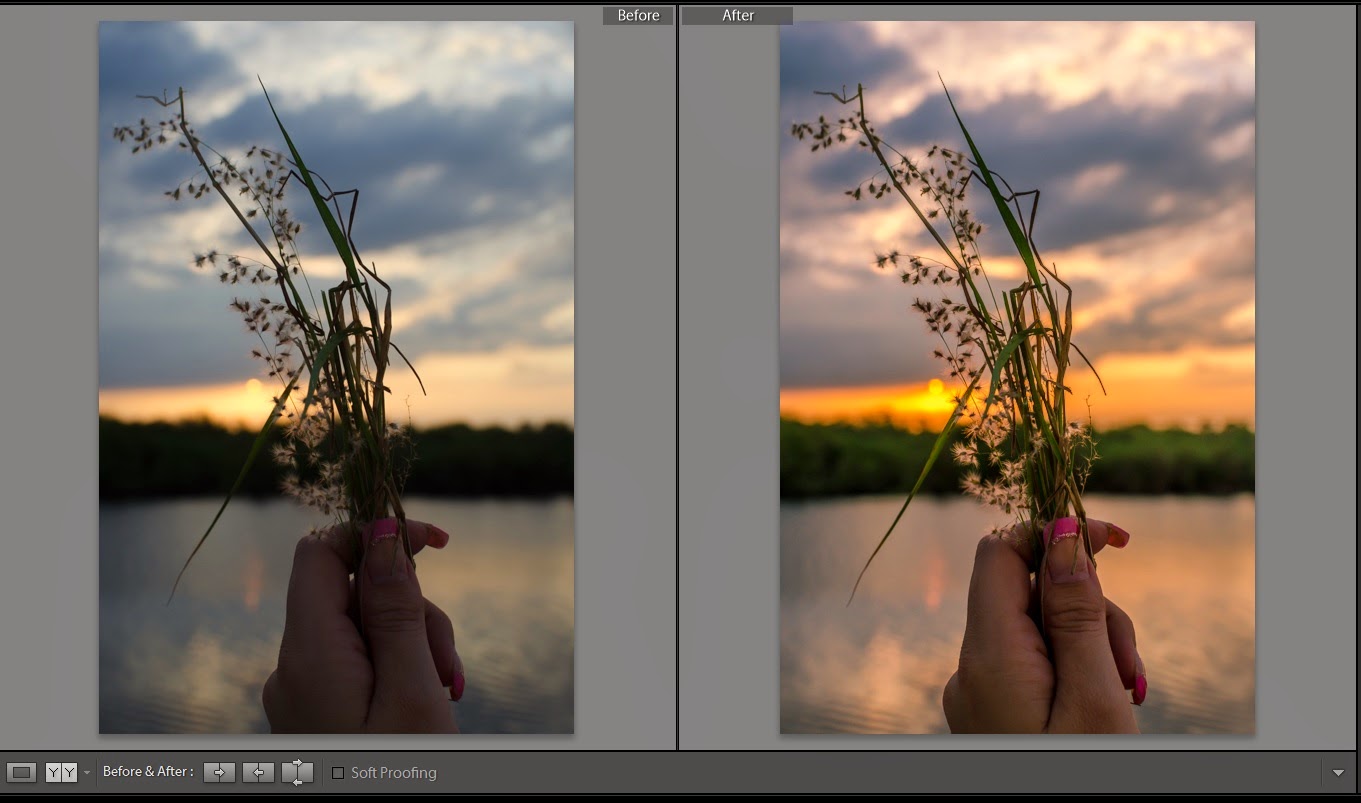
 Sometimes we just dont get it right in camera. If you shoot in RAW, Lightroom can be savor for underexposed images. I go walking through the Everglades here in Florida quite often and here are some recent images I didnt quite get right in camera and was able to save in post. By shooting in RAW there is much more flexibility in Lightroom and other software editing image to "recover" it. Notice in the images below the detail I was able to extract that otherwise would have been gone.
 Find the Download link at the bottom with instructions on how to install this custom preset I created to pull the detail out of your images and eliminate most shadows. With this Preset I also added a soft purple tone to really make your landscapes pop!
One of the easiest ways to recover underexposed images is to raise the shadows on the Lightroom tool bar by sliding it to the right until you begin to see your image return. See Below
There are more advanced ways to recover unexposed images including using the tone curve in the next drop down menu of your tool bar.
2 ways to install-
1. Click the link below, it will open a new page
2. Download link
3. open lightroom<Edit<Prefrences<Presets<Show Presets in lightroom Folder
4. In new window open the file you downloaded
5.Drag and drop into your lightroom presets folder.
6. Close lightroom then reopen. boom, your preset should be there
Alternate- in your presets bar on the left side of the lightroom panel, right click the folder you want the preset to go into and then click import. Locate the file you downloaded. the preset should now be in your list.


Comments
Post a Comment